Current thread: Mythic forums > Strategy & Advice > Walkthrough, part 2
|
| Author | Message |
Legion
12/11/2011 3:28:09 PM | Its a new day and Cimmeria is back in action. Logging in, I see the following:

See the create character button? That is what Mythic Warfare is all about. Growing your clan by recruiting new clan members is the goal, so let's click that button and double our clan membership.
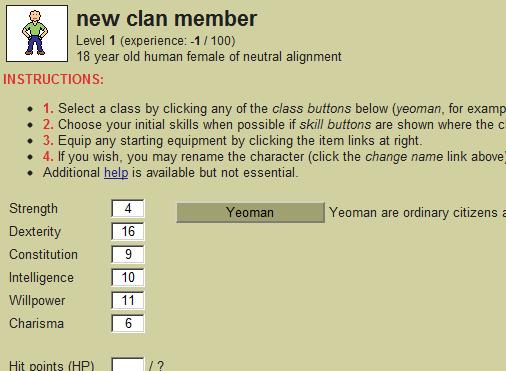
Wow, what a horrible recruit. Sometimes you get lucky, and sometimes you don't. Still, we'll make the best of it and select "yeoman" for the new recruit's class.
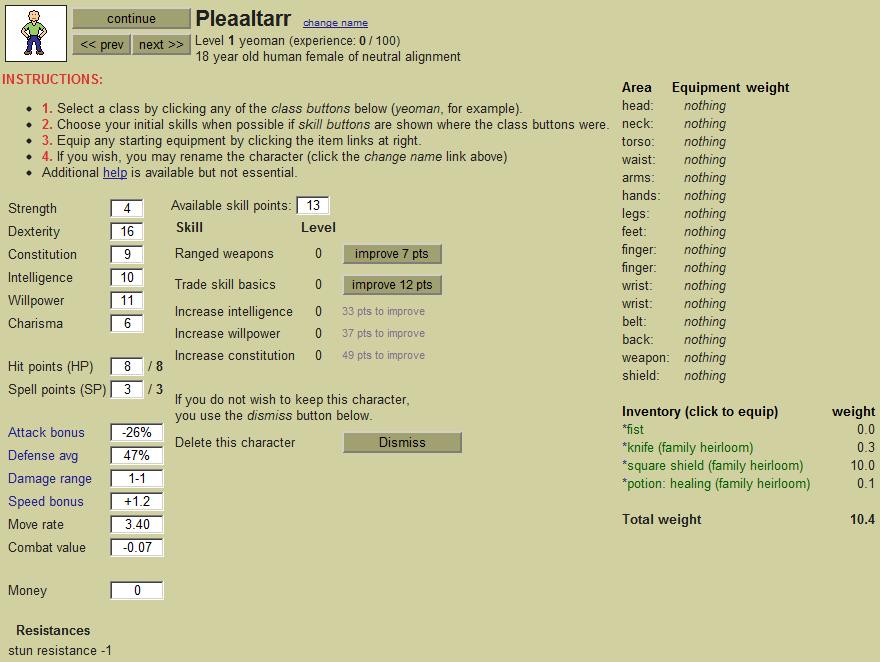
It is very important to make the best of every character you get. A lot of players will look at the two low attribute scores (strength and charisma) and think that this is an unplayable character, dismissing her. I like to think that everyone can serve an important role in Cimmeria, so I'll finish creating this character by choosing skills and equipping the items her inventory. And give her a new name -- how about Jilla. For skills, I'll choose ranged weapons since it might lead to a cheap weapon skill. Usually yeoman want to focus on the trade skills that they excel at, but I don't think Jilla has much chance of living to high level where she could become a productive Yeoman. If she is to live that long, she'll have to develop a combat skill first, so I pick ranged weapons. Unfortunately nothing good turns up. I equip the items in her inventory and reassess:
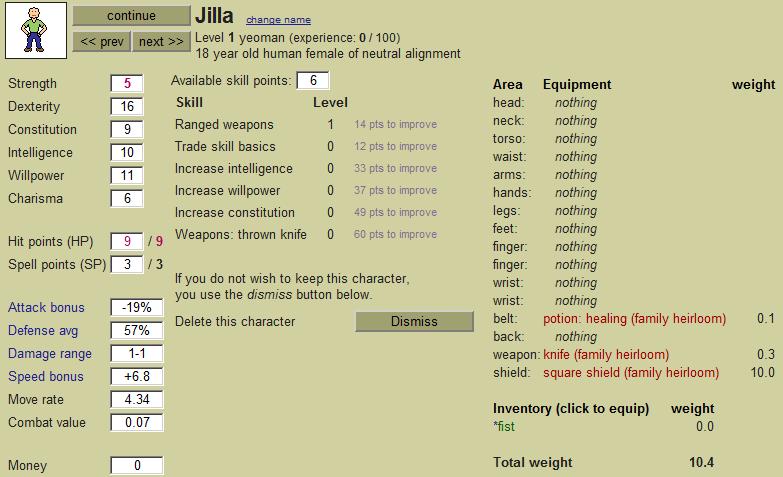
Jilla is not a very good warrior, with -19% attack and the minimum d1 damage. However she does have 9 hp and a good defense, so she can still be a valuable contributor by deflecting incoming monster attacks away from more important characters. And who knows? If she makes it to level 2 we might find some really cheap skills that turn her into a star. I click continue to return to the main screen.
My next move isn't clear to me. I see three options. (1) I could go to the clan page and do another daychange. With the clan gold on hand I would hire a third character to really bulk up Cimmeria. (2) I could create a party out of both my characters and do an adventure, hoping to get a little more gold so that my next daychange will not send my clan gold below zero. (3) I could do a random adventure, since they generate about 3x the amount of treasure as a normal adventure. A random adventure, however, will never use characters who are below 75% of their maximum hit points, so Trunty would not be selected. That means a random adventure really isn't so random at all: it would be Jilla alone. I have to rule out choice (3) since Jilla is unlikely to be able to kill any monsters by herself. I'll also rule out (1) since ending the clan day now, with no cash on either character will end up with my clan gold going below zero. That would probably be fine, since I'd get a third character to work with, but I feel like I should make some kind of effort this clan day to make some financial progress. That leaves (2), send both characters on an adventure together. To create an adventuring party, go to the people page by clicking the appropriate link in the menu bar.
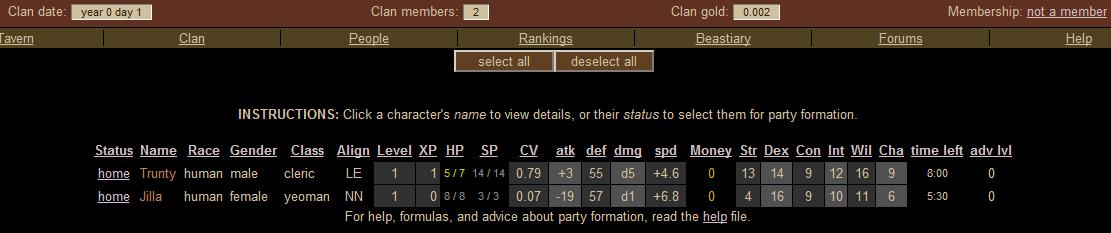
I can't help but notice the CV (combat value) difference of my two Cimmerians. Trunty is a respectable 0.79 while Jilla comes in at a pathetic 0.07. If I needed any more proof of her inability to kill monsters effectively, there is it. To create my party I click the "home" links beside both their names to toggle their inclusion in the party. Clicking "home" turns it to "ready.'

You might want to play around with forming a named party, which will save this party configuration (that is, Trunty and Jilla selected) for future use. You could also form QuickParty which might seem confusing but essentially forms a saved but temporary party and jumps right to the group setup screen. Since I'm not worried about group setup, nor particularly interested in saving this party, I just return to the main screen by clicking the main link from the menu bar (not pictured, but it is the link at the far left of the menu bar).
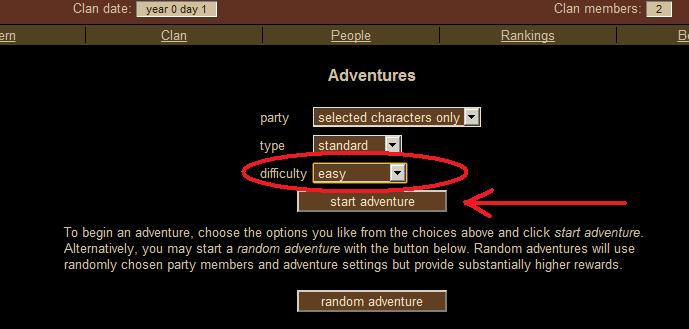
Back on the main page, I make sure "selected characters only" is selected. I choose a difficulty level of easy and click start adventure.
|
Legion
12/11/2011 4:01:28 PM | The adventure:
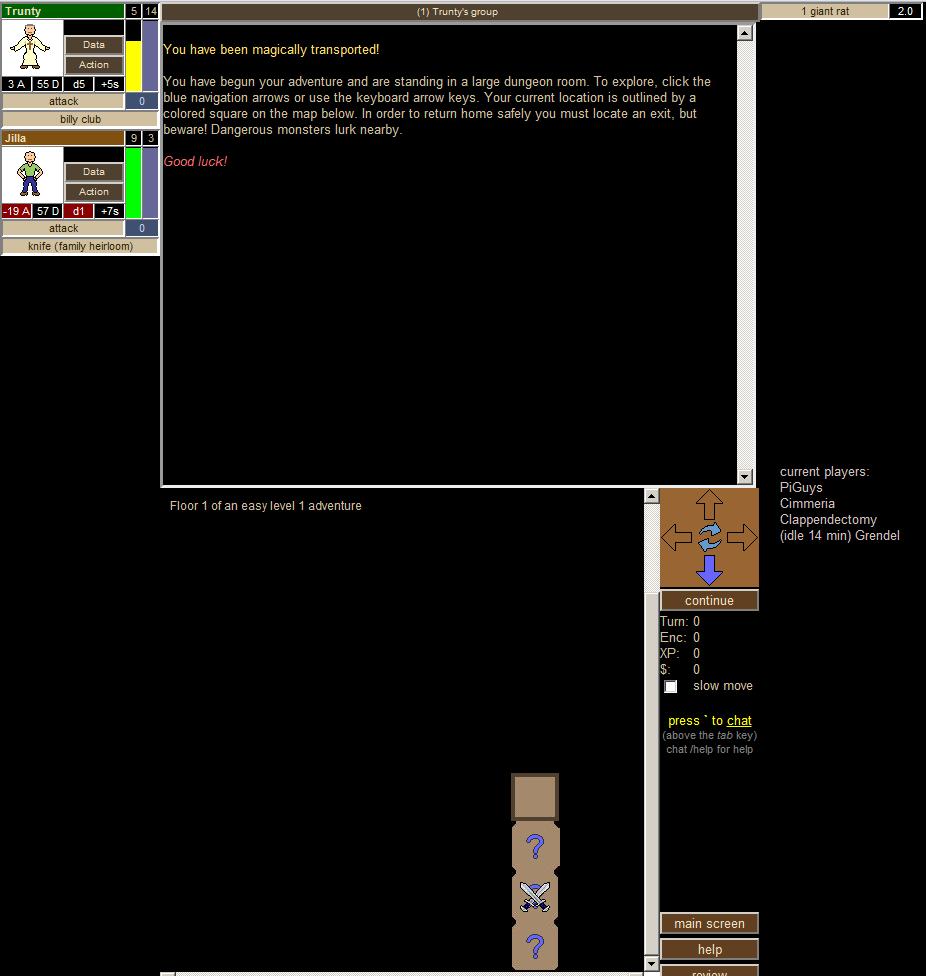
I won't go into as much detail about the adventures today, but some things are worth repeating. I don't want to risk any character death! The first thing I need to do is find out how tough that giant rat to the south is. I also notice that there is a side corridor branching off to the east one square south of my party. This can be hard to see, but note that the east wall of the next step south looks slightly different than the other squares. The indicates a side passage. I want all the information I can get before I decide how to handle this encounter, so I want to know both where that goes and if other monsters are there. I move S one square.
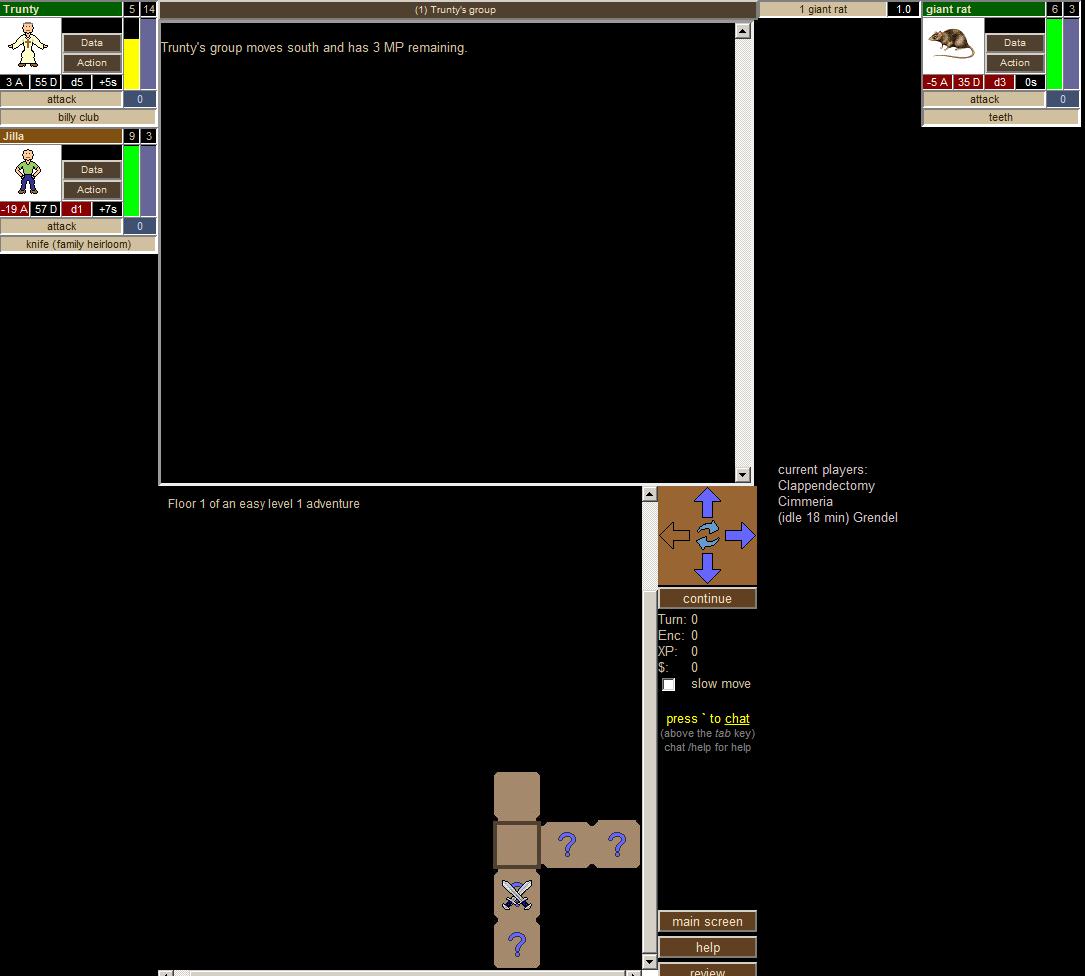
Ok, we have a lot of information here. First, I note that this group has 3 MP left. I actually checked that before moving by clicking the circular arrows in the middle of the navigation panel. If I'd only had 1 MP to work with, I would not have made this move because in the event that monsters were to the east, I would have been fighting multiple monsters at a time and that should always be avoided at all costs! As you can see, the hallway to the east is clear and the rat is dangerous, but probably killable. The d3 damage is a concern, since Trunty only has 5 hp. But the rat has a very poor defense score so I should kill it quickly. Its attack of -5 is pretty good for a giant rat, but my defense scores are high and I might not even take damage. So I feel good about killing this rat -- how to do it? The worst thing I could do is move on top of it. In the same square as the enemy, remember, you suffer the close range penalties of your weapons. Natural weaponry like a fist, or the teeth of this rat, suffer no penalty at close range. So if I move up the rat would fight just as well as at range, but I would have a harder time hitting it! I would actually suffer another penalty as well: movement. Remember that moving the same turn you attack often leads to missed actions, and moving two squares is worse than one, so at least one of my characters would probably not attack.
Standing still is almost as bad an option. The rat would probably move up, preventing future group moves (you can't move as a group if a monster is in your square) and giving me the close range penalties. Moving back to the north is a bad option too. The rat might move NN and pin me at close range, and even it moves just a single step N I will probably lose attacks due to my two-square move. The best choice is to move east. If I'm unlucky, the rat might wander N and I'll likely miss an attack, but chances are good he will not do that, allowing me to click "continue" over and over from around the corner until the rat moves into range and loses his attack on the first turn of battle instead! As always, these are pretty small bonuses and penalties I'm talking about, but you need every edge you can get in Mythic Warfare. I'll move east .. and hope that doesn't expose me to another monster group I haven't seen yet. It does not, and I click continue. The rat doesn't appear, so I click continue 6 more times until he stumbles into range.

Another perfectly executed ambush. Good work, Cimmerians! The rat happened into range but because of his movement he was going to act late in the round, if at all. It was a stroke of luck that both Trunty and Jilla hit for maximum damage (wielding the billy club pays off!) and the rat is dead. And look at that treasure: a spear was found, among other things, and spears can be wonderful low level weapons. They have a horrible -25% close range penalty, but if you can manage to avoid ever letting the monsters get into your square, it is one of the best early-game weapons available. Hopefully we will survive the adventure and live to equip it. For now, we'll keep exploring the dungeon. As you move about, remember to always keep plenty of MP available (by ending your turn before using your full allotment) so that when you see a new monster you can run back to safety. The pattern I've used over and over here is one that I will continue to rely on:
1. Carefully locate monsters and retreat to a hiding spot unseen.
2. Find a way to "scout" the monster by moving adjacent to it in a location that allows a full retreat into hiding again after the scouting.
3. Decide if you can kill the monster with minimal damage and risk.
4. If you can't kill it easily, find a safe spot and flee the adventure.
5. If you can kill it with little risk of serious damage, position yourself someplace where the monster will eventually wander into range. If you have to, retreat after the first round of battle behind another corner someplace and repeat the process. In most cases, the monsters will want to fight at close range (range 0) and you will want to fight at range 1. Make sure you dictate the terms of the engagement! As you play more you'll start to learn what weapons are better at what range, and which monsters like to charge in close and which will stand off at a distance. But you will always want to fight on favorable terms and never want to get pinned by a monster group when there is a possibility of a second monster group joining the fight.
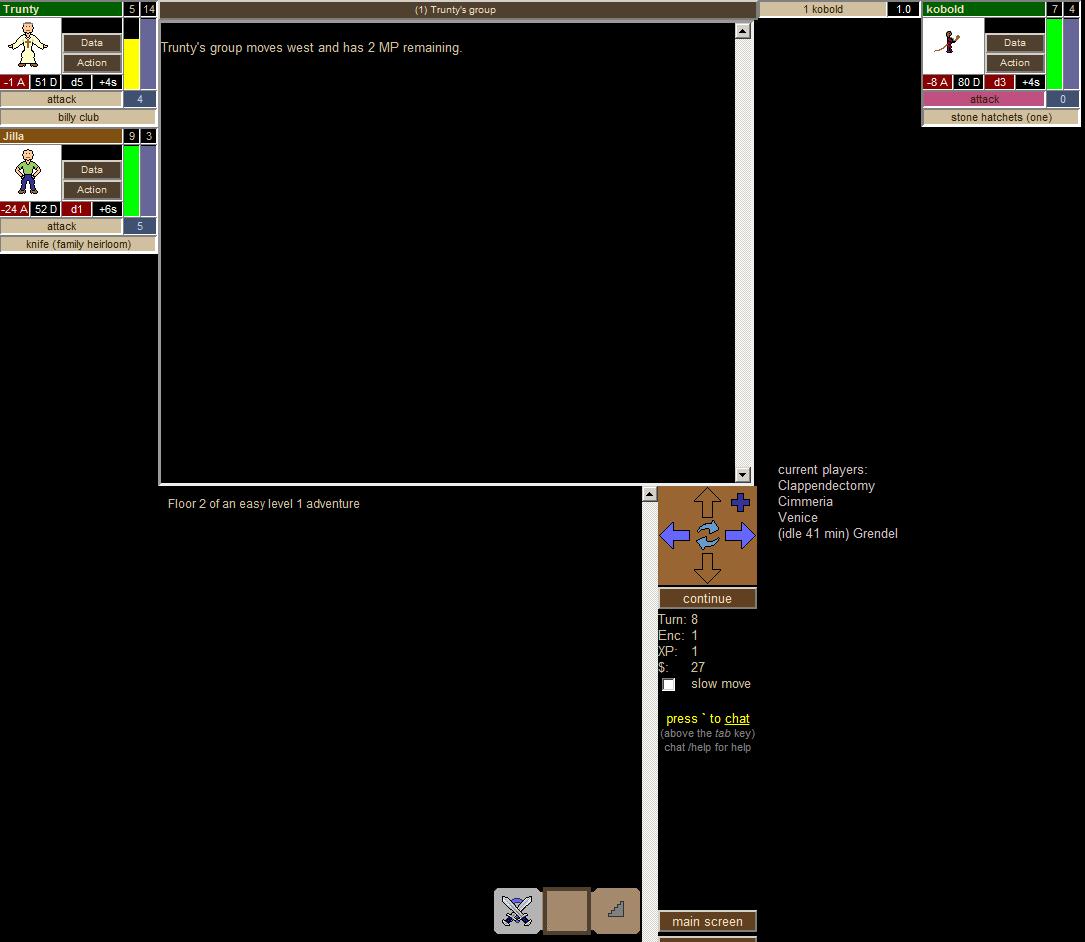
You'll notice I jumped ahead a few turns here. I explored the entire map and have located the final room. There is a single kobold in it, and I have 2 MP remaining at this point which I will use to move EU (east-up) to get out of LOS of the kobold.
So what are we up against now? This guy looks pretty tough. 7 hp with a stellar 80 defense. That is one tough kobold! Jilla has no chance of hitting him, and even Trunty is going to have a hard time. The kobold is armed with a single stone hatchet, which is a thrown weapon. There is a good chance he will miss, at which point he will revert to his claws and try to move in to close range to fight me.
I don't think I can kill this kobold. If I manage to keep him at range 1, I'll have a 19% chance of hitting him each turn. It is likely that eventually he will pin me and we'll be at close range, where my club-class weapon has a -10% penalty, bringing my hit chances down to 9%. The fight is 2-on-1 and eventually the kobold will build up fatigue. But I'm not sure I'll still be alive. I don't know what kind of damage his claws will do, but d3 is a good guess since his respectable -8A attack score indicates to me he probably has a decent strength score that will translate into above-average claw damage. All told, I think this battle carries too much risk. We were here to get some treasure, and we've got it. I'm going to move this group all the way back to the furthest point of the map and flee. Adventure over.
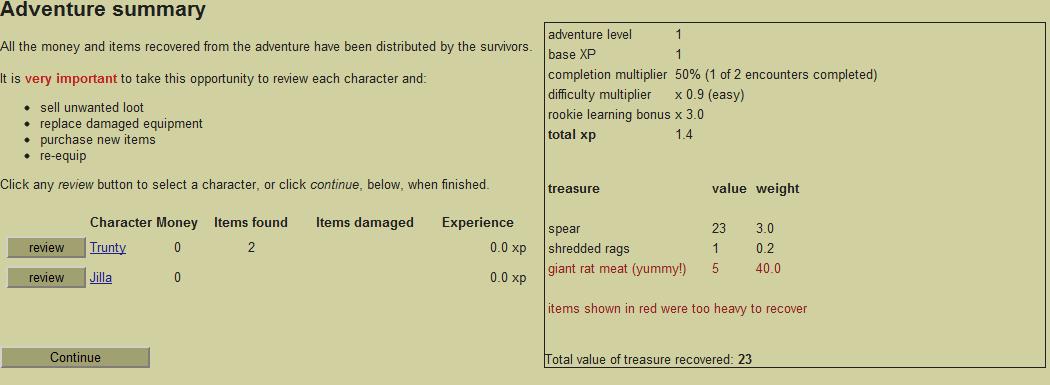
We got no experience since we fled, but that's not a problem. I'm really not after experience at this point. I'm after treasure. My goal is to grow my clan by recruiting new characters, and that takes money. I want to get treasure without taking damage, since that will reduce my ability to do more adventures before resting to heal. I also want to improve the equipment my characters are using, since that will help me kill monsters more quickly and while taking less damage -- leading, again, to more money with less risk. We weren't strong enough to drag home the giant rat meat (when you flee, you can't carry much treasure with you) but we got what counts: that spear. Both items seem to have gone to Trunty, which is no surprise since he has more experience than Jilla. I'll equip the spear, and the rags (which provide a little arm protection).
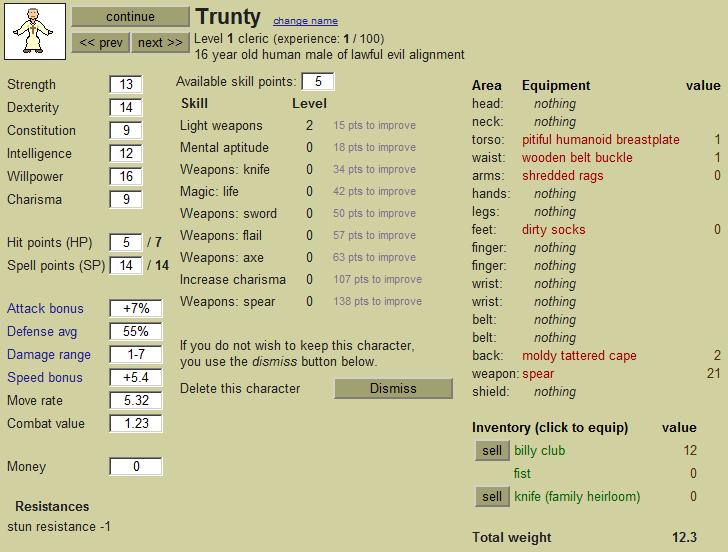
Trunty is getting tough! With that spear, his attack bonus is up to +7% while his damage is up to a whopping d7. Things will be much easier with that spear. Notice that I decided to keep the billy club as a backup weapon instead of selling it. Weapons break, and I like to carry two or more backup weapons for each character, when convenient. Keeping the club and knife in my inventory will prevent me from losing too much killing power in the event that my primary weapon, the spear, breaks. It is also nice having different weapons for different situations. In close combat I will switch to the knife, which has a lower close range penalty. Many monsters take reduced damage from certain weapon classes as well, so some variety is really helpful. If I were to fight a skeleton, my spear would be almost useless but that billy club would do full damage. Against creeping vines the spear and club both are ineffective and I would want a cutting weapon, such as the knife. Of course, keeping everything I found means I did not get any money, so we're going to head out on another adventure! |
Legion
12/11/2011 4:59:49 PM |
I start another adventure, just like before. A little careful exploring reveals both the treasure room (devoid of treasure) and a nearby monster, a gnome:
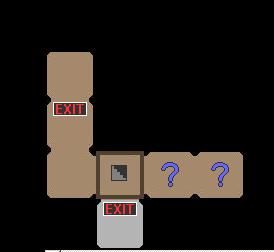
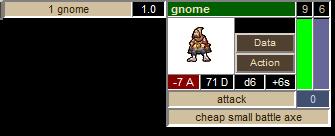
Obviously there is no way we can risk a battle with that gnome. His d6 damage could kill Trunty in a single blow. A very easy decision to exit. There is no shame in fleeing/exiting most of your initial adventures. Someday Cimmeria will be tough enough to cruise through introductory adventures, but today is not that day. Better to exhibit prudence and flee.
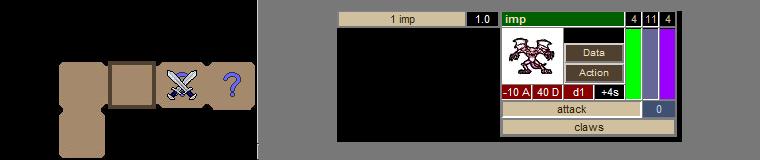
On my third adventure of the day, I spotted an imp. When I first saw him, he was at the far end of the corridor, 1 square east of his current location. With 4MP available, I was unable to move adjacent to him while saving enough MP to retreat behind my corner, so I waited. After a couple turns I took a look around the corner and the imp had advanced, so now I can move my second step to scout him, leaving 2 MP to retreat to cover. I like what I see. There is a good chance I can kill him using my standard ambush tactic, by waiting WS (west-south) from my current location. If I don't, he will surely move to close range and pin me there, but Trunty will switch to his knife if that happens and finish the battle that way. The imp only does d1 damage so I am not in much danger. I move WS and wait.
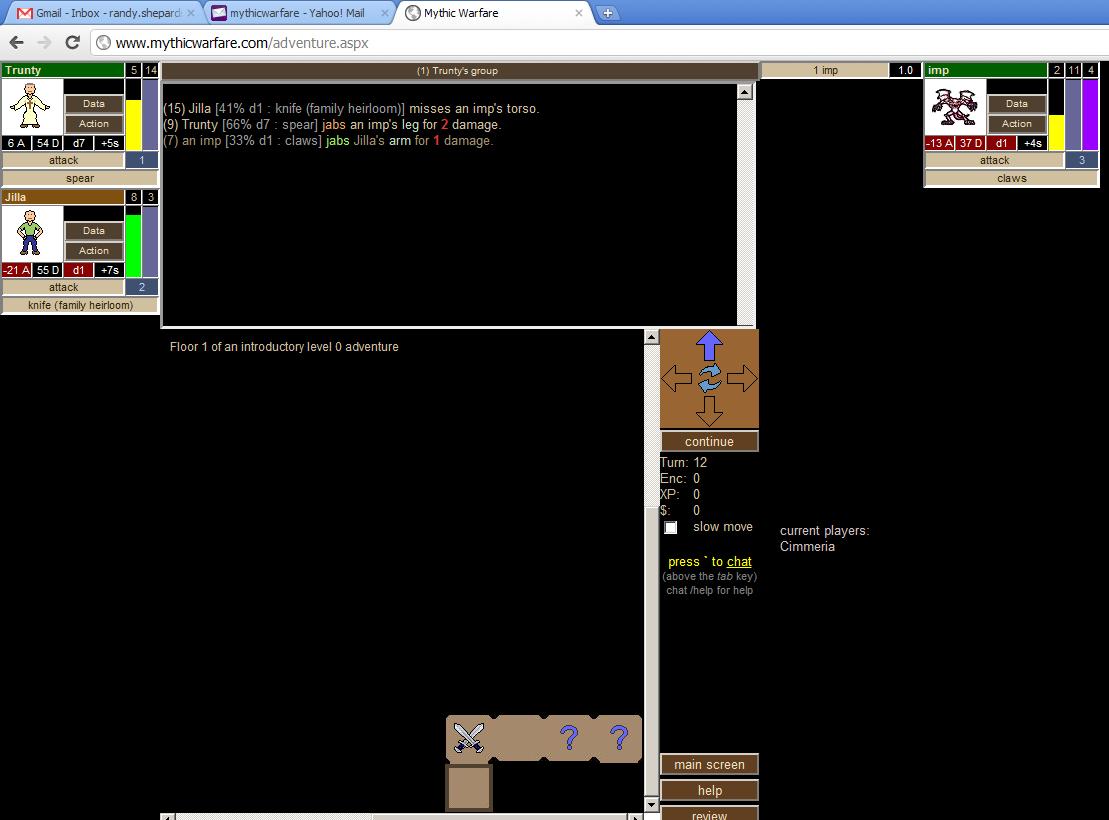
9 turns later, we engage. Trunty hit, but did not kill the imp. Unfortunately, the imp hit Jilla. But that is what she is there for: better her than Trunty! I could swap to the knife now, but sometimes monsters don't make the smartest move right away, so I'll run one more turn and hope the imp stays in spear-range.
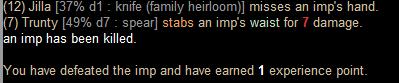
Clearly the imp did move into close range (see how Trunty's to-hit chance dropped to 49%?). But that's ok, Trunty hit it anyway for maximum damage and the imp is dead. It should be really clear by now why we fled from the last few adventures. Why risk a hard fight, when patience will reward you with an easy one? Sadly the imp had no treasure and the treasure room was empty, so we're off on our 4th adventure of the day.
On the 4th adventure we killed a gnome, although Trunty was hit (down to 4hp). Treasure gained was minimal.
On the 5th adventure, we carefully located a dangerous looking rat who did d5 damage with +7 attack! Needless to say, we fled.
The 6th adventure was incredibly deadly. We located two monster groups, and each one consisted of a single kobold wizard. Kobold wizards are extremely dangerous to level 1 characters, since if they have 10+ spell points (sp), and both of these did, they are capable of casting a d10 lightning bolt that could have killed our brave adventurers in a single strike! We located an exit and avoided the monsters.
On the 7th adventure of the day, disaster struck.
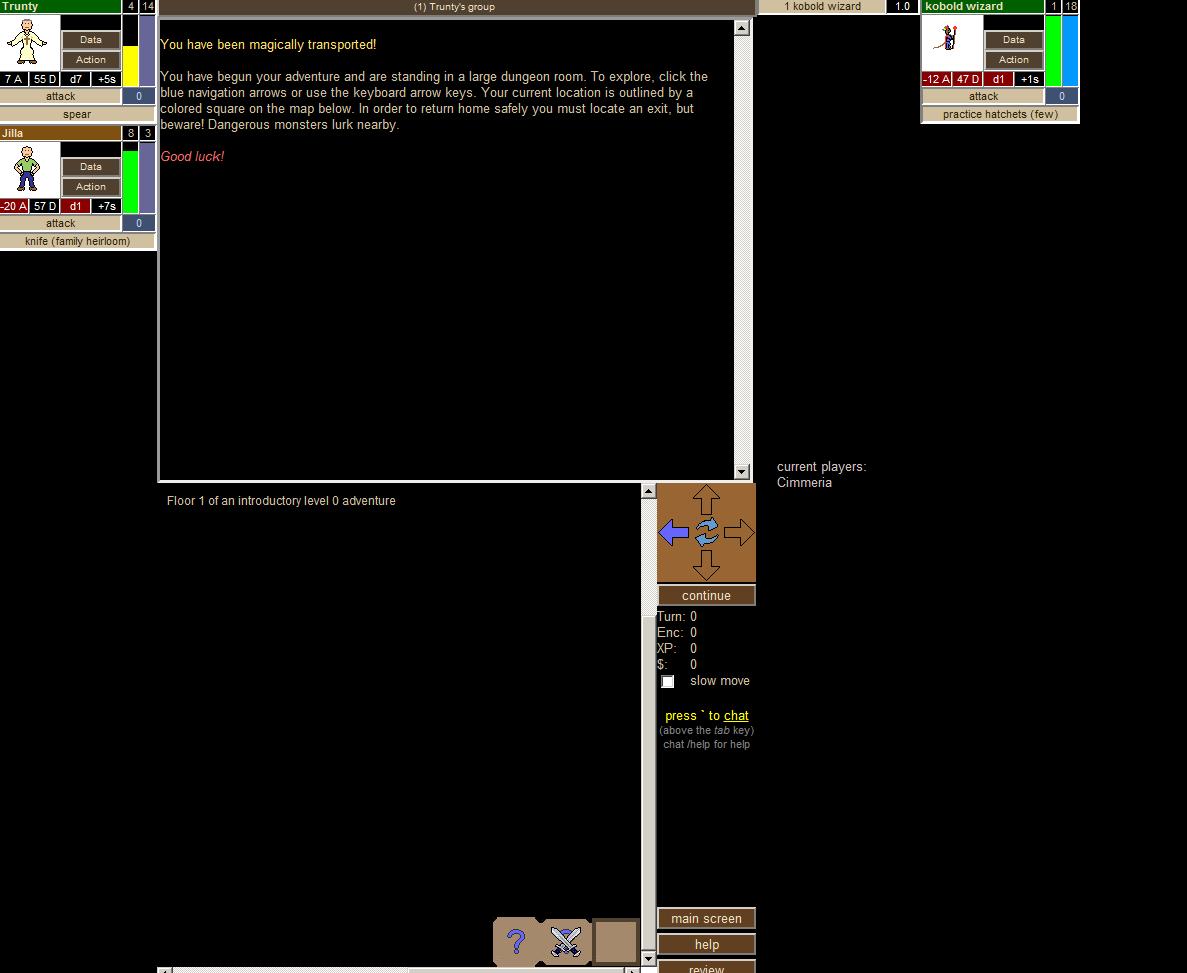
Another kobold wizard, with 18sp, and we have nowhere to run. Our only options are to run or fight. The wizard has only 1 hp and a low 47 defense, so I think there is a good chance that we can kill it before it kills us. A lot will have to go right here: we have to attack before the kobold acts, we have to hit, and we have to kill it. Killing it isn't a problem, with 1 hp any hit will do. Even Jilla could kill it (and with 47D on the kobold, Jilla might even hit it). Hitting it is easier with the spear if it does not move, and easier with the knife it if moves into close range. However it is armed with a ranged weapon (throwing axes) and long-range magic (lightning bolts) so it is probably going to stand where it is. Thus, the spear is the best chance of hitting it. However, note that Trunty's speed is +5. Remember way back in the beginning, when he was using his knife? His speed was +8 with the knife. Let's do a quick calculation: to hit with the spear I will have a 100 (base) - 47 (defense) + 7 (my attack) chance to hit, or 60%. With the knife it will be 5% worse, or 55%. I can know that by looking at my character page by clicking Trunty's data button and holding the mouse over each weapon. The spear has a +5 attack modifier while the knife has +0, so attacks with the knife at normal range are going to be 5 points worse than the spear. But I think the faster attack makes up for that. I need to get lucky to win this without getting nailed by a lightning bolt, and the faster weapon will give me a better chance of getting lucky. And let's not forget that the knife confers a bonus hp! Make sure you look over all your equipment and familiarize yourself with the unique traits of each item. You never know when you'll want to optimize your chances by swapping gear.

Most items take a few rounds to equip. You've probably noticed that one of the actions you can choose from the action panel is equip. In fact, there are a lot of actions I haven't mentioned or chosen yet. You can use the action panel to cast spells if you have any, set tanks if you have warriors with the tank skill, use special items like potions, specify targets in multi-group settings, attack, evade, and take various other actions. One of the actions you can choose is equip. This will set your character to equipping and he/she will not make any attacks while you are equipping. Take a look at the character page again. Notice anything different? In the equipment list there is a "delay" column. This number shows how many turns you must be equipping before the item can be equipped or removed. A character with a high dexterity like Trunty can sometimes equip small items with no delay at all! This is the case with the knife (family heirloom). If there was a number in the delay column, he would have to miss a few turns while swapping gear, which obviously we would not do in this situation. Normally it is easy to find a safe spot around a corner to spend a few turns equipping, but not here! Any delay could (and probably would) result in a lightning bolt that could kill a character. Rather than switch to the knife, if there were any delay required Trunty would make due with the spear. Luckily, there is no delay needed, so I click on the knife and Trunty is ready to attack with a +7.4 speed bonus. Why only +7.4? Well, unfortunately all the gear Trunty is carrying around (like his backup weapons) adds some encumberance and he is no longer as speedy as he was when his only item was the knife. But that's fine, +7.4 is still much faster than the kobold and Trunty should attack first. He will need luck to hit and kill the kobold, but we've done everything possible. Time to end the turn (with continue) and hope for the best!
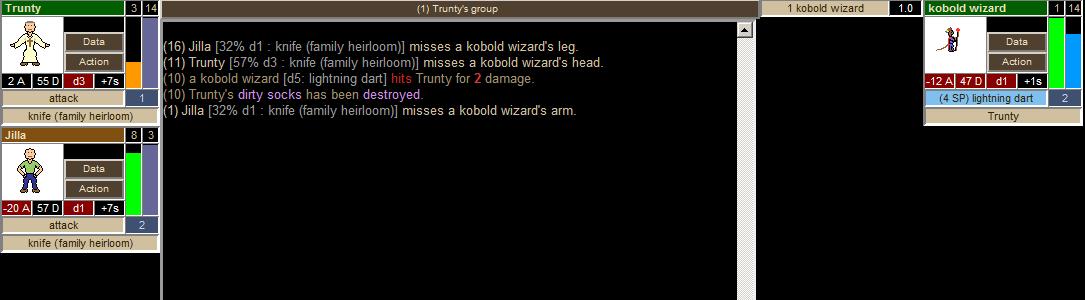
That went poorly. Jilla attacked twice, Trunty once, and no one hit. The kobold decided not to cast a d10 lightning bolt, which was an odd choice (but kobolds aren't very bright). Still, the d5 bolt hurt badly, and Trunty is on the verge of death. Even if he survives this battle, his injuries are severe and he will be out of commission for many days to come. Still, I decide not to flee. Fleeing is no guarantee and I expect that the chances of killing the kobold are greater than the chances of successfully fleeing. I will click continue again. Note that lightning bolt destroyed Trunty's dirty socks. It is not uncommon for attacks to damage equipment.
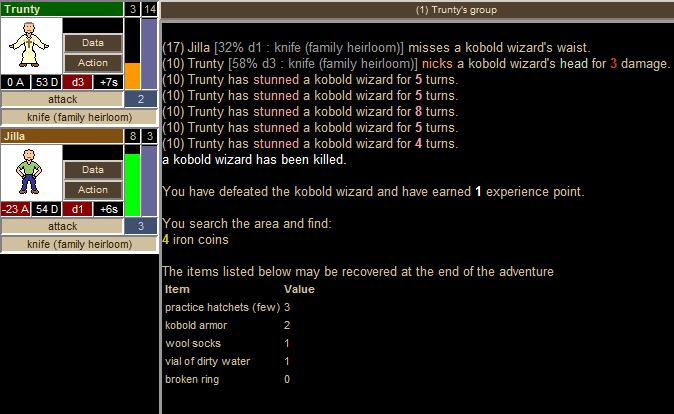
Victory! Head hits are a rare treat, and often do critical damage or stun the opponent. Even if the kobold wizard survived the loss of 3hp, he would be incapacitated for many turns with this terrific, 5x stun blow. Each weapon type has a chance of doing "special" damage, such as stun. Likewise, each hit location has a vulnerability to certain special damage. Head hits are the most damaging and as you can see even a weapon that is poor at stunning (like this knife -- the billy club on the other hand often registers stun damage even to non-head locations) can deliver a game-changing blow. We were lucky to kill the kobold wizard before it had a chance to cast another spell. It was the only monster on the adventure, so I was able to explore the map and take the exit.
At this point, I dare not do another adventure with Trunty, nor do I feel that Jilla could kill anything by herself. Thus, my day is over. The kobold provided us with a few iron coins, and selling the unneeded equipment (keeping what we can use) provided a few more. Cimmeria has had a day of mixed results. A new recruit, Jilla, joined but she is very bad at fighting due to her low strength and lack of fighting skills. Both characters have enough money now to keep the clan gold rising at the next day-change event which is very important, and we will get a third clan member soon. But Trunty was hurt badly, and will likely not go on any adventures for many days to come. This could be a problem for us, for if the new recruit is no better than Jilla times will be tough. All in all, I think Cimmeria is well on its way to success. In fact, I might stop this tutorial here, unless anyone thinks it would be valuable to see a few more days played out.
The lessons to learn are that low level adventures are extremely dangerous. You have to carefully consider each and every move you make, and learn countless facts about monsters, weapons, and game mechanics. It will take a lot of time and experience to become familiar with all the possibilities of Mythic Warfare, and as you gain that experience you might lose a few characters along the way. But once you get the hang of it, as you see, it is pretty easy to succeed. A careful player almost never loses a character. Study each map and each monster and decide if you can risk exploring the dungeon or if you should flee from turn 1. Consider every monster and assess whether they represent a risk that is worth taking. You never want to end up, as I did, with a character with "orange" hit points because they take a long time to heal. Luckily, I'll have a third character momentarily and enough money to get an immediate fourth should I need it -- this should avoid the dilemma of how to handle a lone character with orange hp (instead I can mothball him until healed, or until I can recruit a cleric with life magic). By fleeing/exiting most adventures and only engaging in easy battles you can steadily improve your equipment and fund the expansion of your clan. There is quite a lot to this game, so keep an open mind and never stop thinking about how to maximize the effectiveness of the characters you have. I'll leave Cimmeria untouched for a few days and if anyone would like to see more, let me know. Otherwise I'll consider this a good introduction to beginning game mechanics and strategies. Cimmeria is on its way to greatness! |
Legion
12/11/2011 8:10:02 PM |
Ok, one more post. I feel like I did all the hard work of fighting through another clan day but did not get the reward: the new recruit. So before signing off, let's do that daychange.
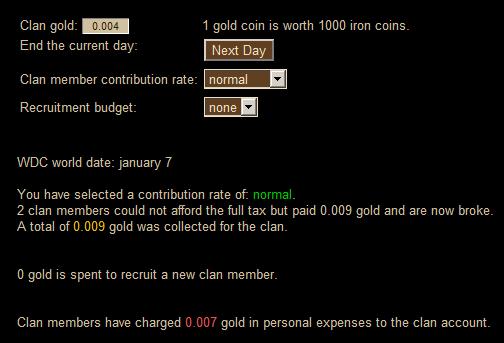
The clan members gave all the gold they had and the clan is up to 0.004 gold. Neither character recovered any hp, which is very unfortunate. We did hire a new recruit (for free) so let's go back to the main screen and create a new character!

Another low strength character. Very unfortunate, since what I really wanted was someone who could kill things. Still, we have the choice of cleric and maybe he'll be able to learn life magic! Once you get a healer, you don't need to rely on day-changes for hp recovery and everything becomes much easier. I choose cleric.
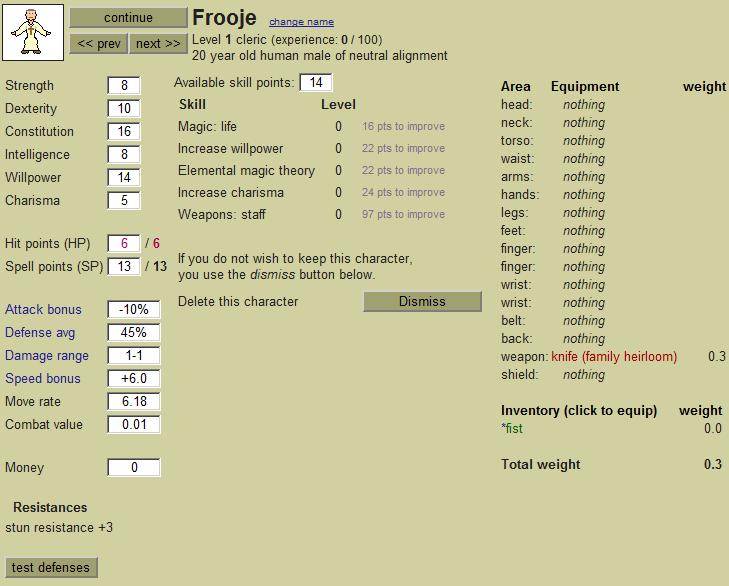
No luck! Life magic is cheap, at 16 skill points, but Frooje only has 14 skill points. Amazingly his CV is even lower than Jilla's due primarily to the lower defense and less hp. The biggest bright spot is that life magic though. Every few adventures characters gain skill points, so it won't be too long until Frooje is able to learn the most important newbie skill in the game. Cimmeria is very close to unstoppable now; just a few good adventures (enough for 2 skill points) and Frooje can heal Trunty and we'll never look back. Hooray!
|